Part 1 - Email notification of Certification
Expiration
Part 2 - Check settings of existing Certificate
Part 4 - Submit CSR to ATT Versign site
Part 5 - Install the Verisign root trusted CA
Part 7 - View result in Portecle
You
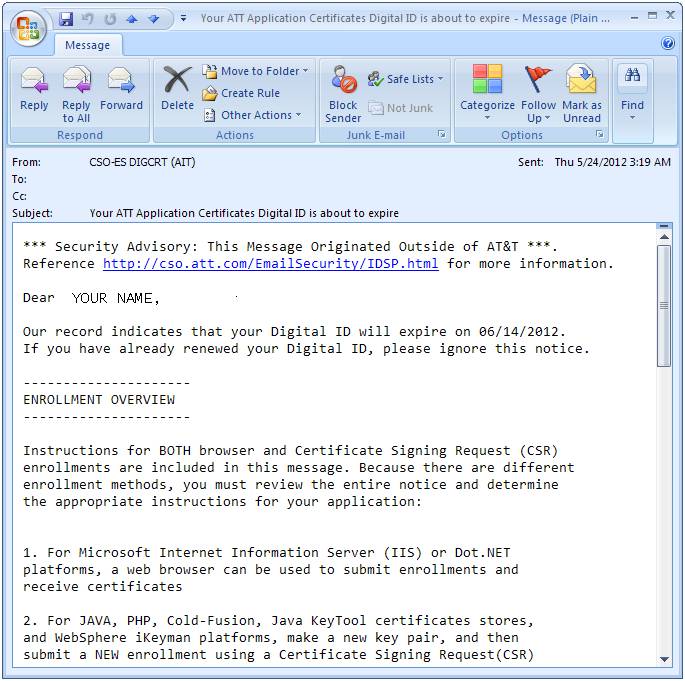
have received an expiration email from AT&T, with subject “Your ATT
Application Certificates Digital ID is about to expire”, for example:
t is critical to ensure you use the same Common Name
as you originally enrolled with, here is how to validate that. If any questions
refer to LSR or EBTA prod support.
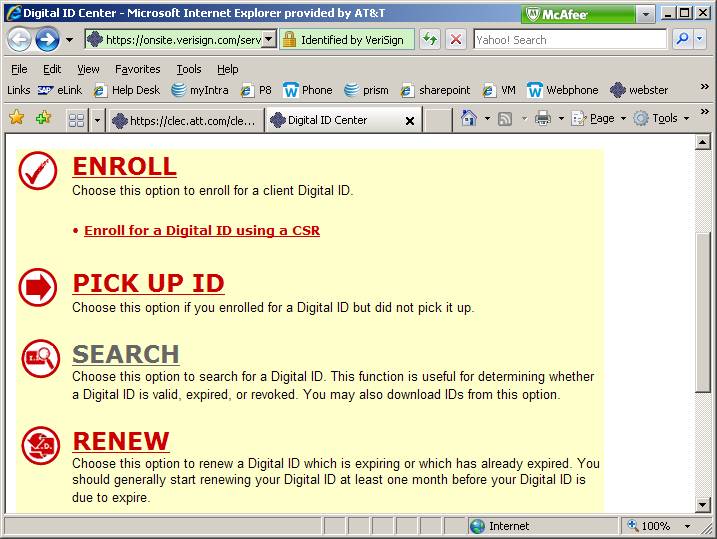
To
check Common Name, go to
https://onsite.verisign.com/services/ATTServicesIncApplicationCertificates/digitalidCenter.htm
and use the SEARCH option to find your entry from last
year.
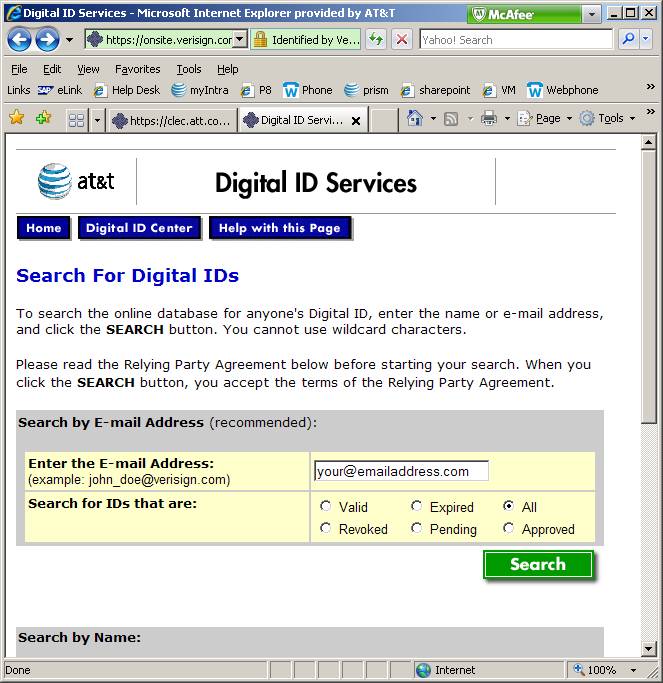
When
searching by email address, the email address will match that of the “Your ATT
Application Certificates Digital ID is about to expire” email recipient
Found
a match
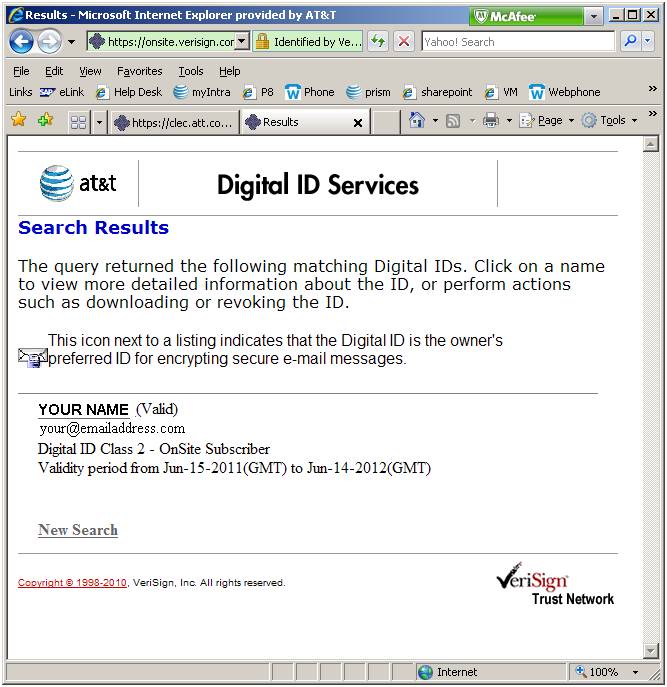
Click
on the name to see the details
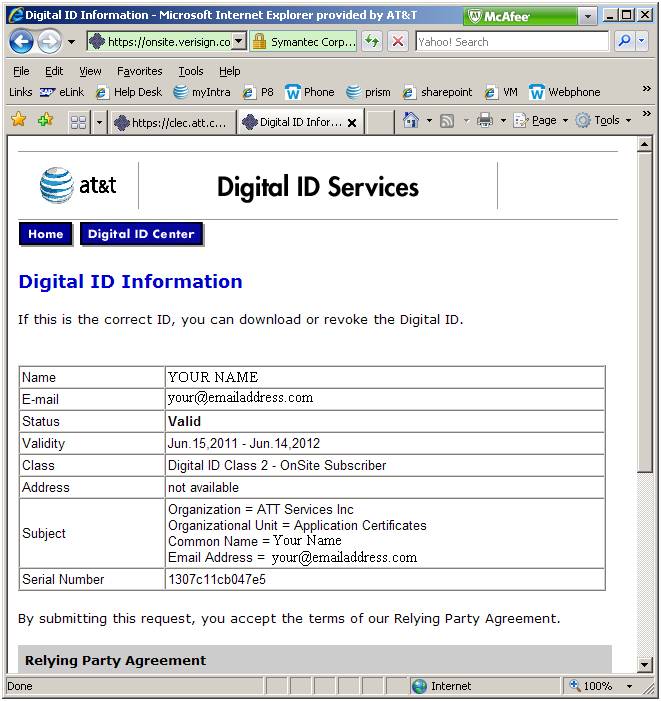
Here
we find the exact common name used in the last enrollment: “Your
Name”
We
now have all the needed info to create our new CSR for this years’ enrollment
Acquire
Portecle: http://portecle.sourceforge.net/
Run
Portecle
File
-> New Keystore -> Select your preferred Keystore type -> OK
Tools
-> Generate Keypair -> (Default Key Algorithm
& Key size are fine) OK -> Enter info
|
Field |
Sample
value |
Notes |
|
Common
Name (CN) |
Your
Name |
From
step 2 |
|
Organization
Unit (OU): |
Application
Certificates |
Must
use this value |
|
Organization
Name (O) |
ATT
Services Inc |
Must
use this value |
|
Locality
Name (L) |
Dallas |
|
|
State
Name (ST) |
Texas |
No
abbreviations |
|
Country
(C): |
US |
|
|
Email
(E) |
|
Portecle does not accept a value |
Like
so
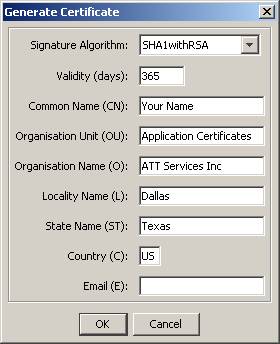
->
OK -> accept default ‘key pair entry alias’ ->
OK
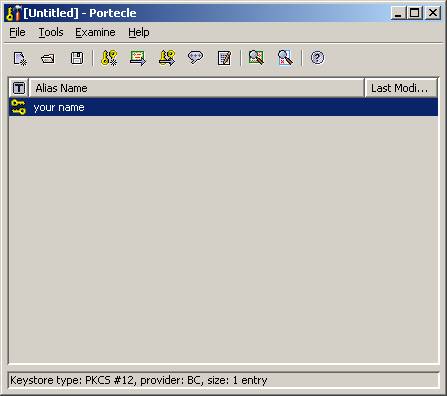
We
now have our private key in our new keystore
Right-click
on key, and select “Generate Certification Request”

Save
the csr file
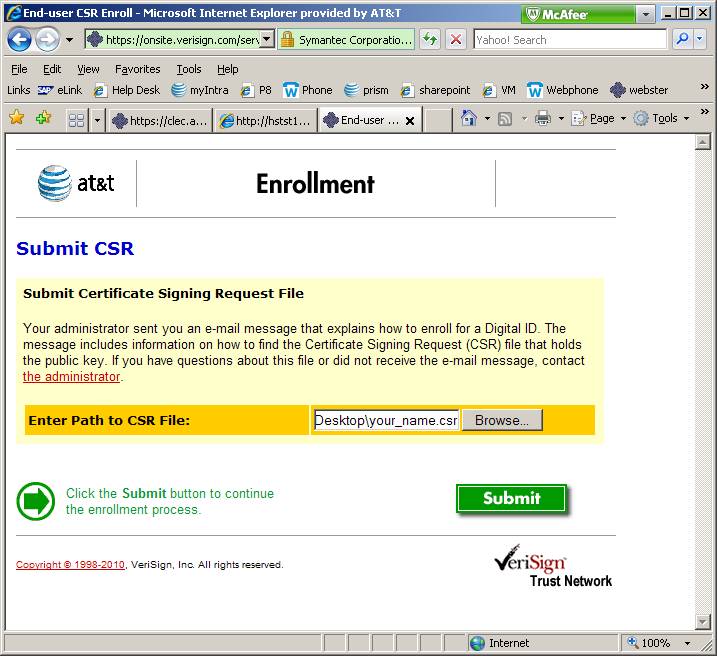
Part 4 - Submit CSR to ATT Versign site
Go
back to Verisign site
https://onsite.verisign.com/services/ATTServicesIncApplicationCertificates/digitalidCenter.htm
Select
the “Enroll with CSR” option
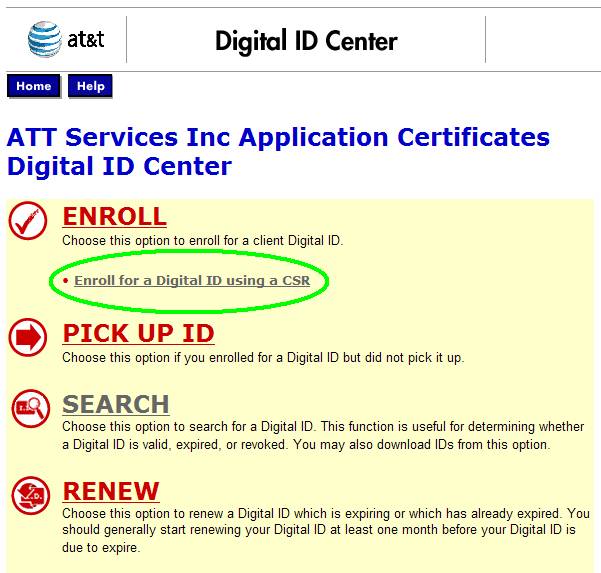
Browse
to & select your CSR file, Submit
Enter
some info again. In this form, it is required that the concatenation of “First
Name” and “Last Name” matches the Common Name in your private key
“Your”
+ “Name” matches “Your Name” in this case
Choose
an appropriate sponsor. For LSR/ASR, Doug Lemmons
or Pete Mullen. For EBTA, Jeff Hammer or Sharon Wagoner
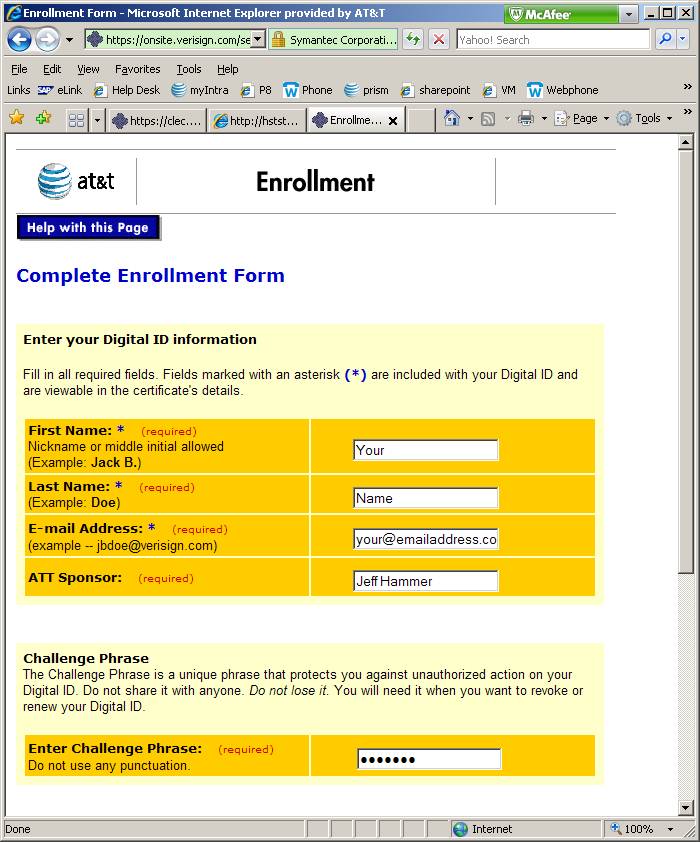
Submit
A
confirmation email will be sent shortly thereafter
Go
back to Verisign site
https://onsite.verisign.com/services/ATTServicesIncApplicationCertificates/digitalidCenter.htm
Right
click on “INSTALL CA” and save it
In
Portecle, do
Tools
-> Import Trusted Certificate -> select the file -> OK through warning
messages -> OK
The
new cert will now sit along side your keypair
Part 6 - Install CSR Reponse
Upon
CSR approval, another email is sent. It will have an attachment file, of p7b format. This file is
useless, disregard it!
Go
back to Verisign site
https://onsite.verisign.com/services/ATTServicesIncApplicationCertificates/digitalidCenter.htm
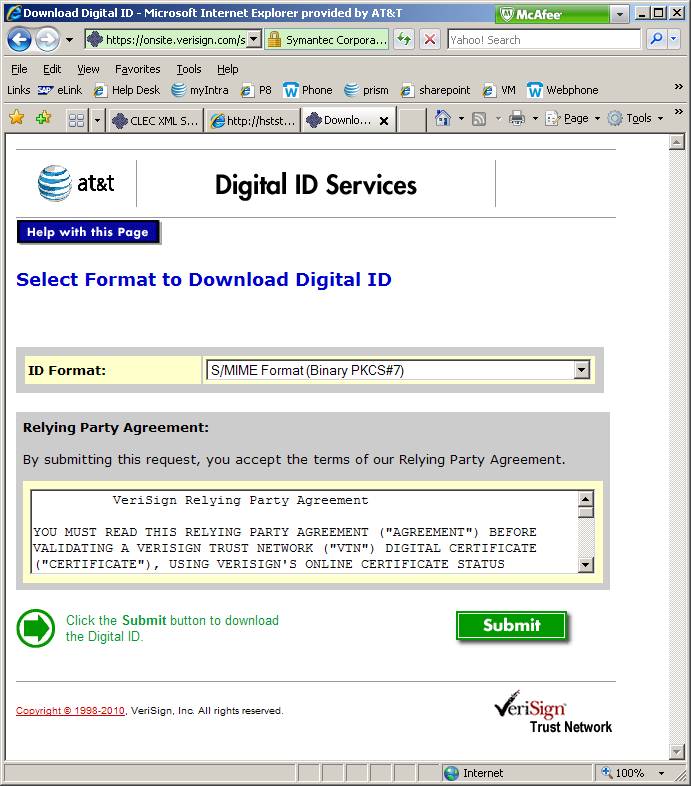
Search
for yourself again, as did in step 2. You will now find an entry for your new
cert. Select it. Select the ‘Download’ button. Choose Format “S/MIME Format
(Binary PKCS#7)”. Submit, and save file
Back
in Portecle, right click on your keypair,
select “Import CA Reply”. Select the p7c file from the
last step
OK
through warning messages -> OK
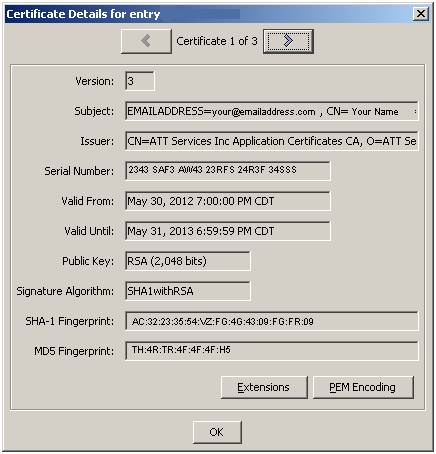
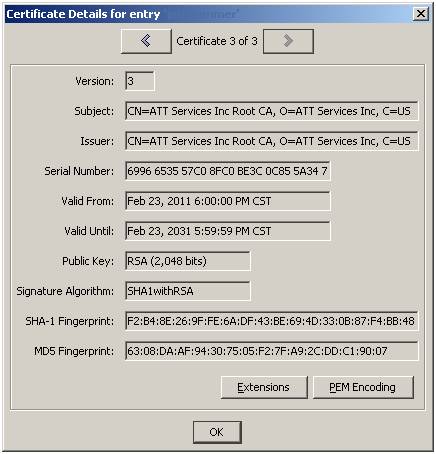
Part 7 - View result in Portecle
The
result is a keypair that chains 3 levels. Double
Click on the key pair, and use the left and right arrows to navigate through
them:
You
can see a ‘chain’ exists starting with the Subject in the client cert, passing
through the intermediate cert, and terminating in the trusted root. The 2nd
row in the table below illustrates this.
|
Client cert |
Intermediate cert |
Root CA |
|
Subject = xxx Issuer = yyy |
Subject = yyy Issuer = zzz |
Subject = zzz Issuer = zzz |
|
|
|
|

File
-> Save Keystore As…
Choose
password if you like
The
keystore & connectivity can be validated online
using the tool we provide:
https://clec.att.com/clec_xmlsupport/tester/lsr.html
The
tool will show the certs in the keystore.
The tool can also submit an XML transaction using the keystore.
Any XML response is considered a successful connectivity test.
Successful
test:
